Rocketry
Bottle Rockets
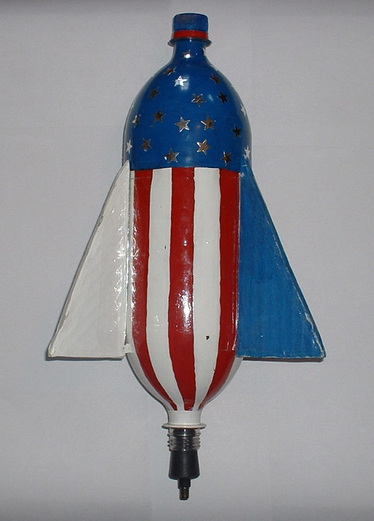
We built bottle rockets in Mr. West's rocketry class. The rocket to the left is not my rocket but is nearly similar to the one I built. The one I built had paper fins and it had four fins instead of two fins. To build a rocket like this, you must have 2 bottles. One bottle is not cut at all. That is the lower bottle. The top part of the rocket is the second bottle. This bottle was cut in half so it would form to be the nose cone. At the top of the rocket there should be some clay below the cap which helps the rocket fly. To launch a rocket like this, you will fill the bottom bottle with water. You then put in pressurized air. When you pull the string, the air pushes down on the water which causes the rocket to fly.
This project is a good example of Newton's second law motion when the pressurized air pushes down onto the Earth, the Earth pushes back onto the rocket causing the rocket to fly. We will learn about Newton's laws of motion next year in Physical Science. In this project we needed 2 2-liter soda bottles, clay, index cards ( for the fins), and duct tape.
This project is a good example of Newton's second law motion when the pressurized air pushes down onto the Earth, the Earth pushes back onto the rocket causing the rocket to fly. We will learn about Newton's laws of motion next year in Physical Science. In this project we needed 2 2-liter soda bottles, clay, index cards ( for the fins), and duct tape.
Newton Vehicles
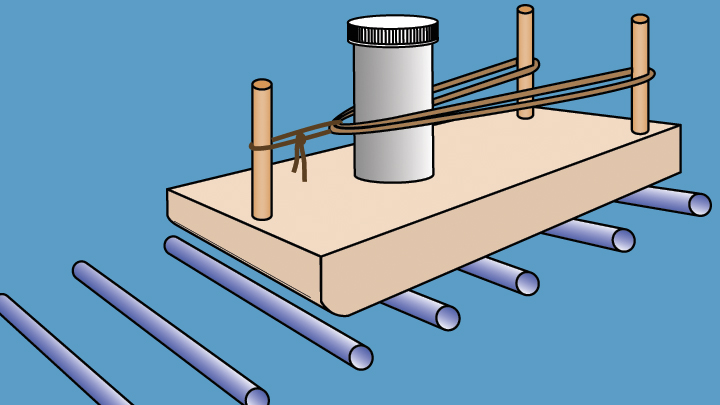
In this project, we learned about Newton's 2nd law of motion and what affect it has and how it applies to rockets. Instead of the container you see in the photo, we had wooden blocks which we could fill with pennies. We learned that when the Newton Vehicle got rid of a small amount of weight, it didn't go that far. When the Newton Vehicle got rid of a lot of weight, the vehicle went farther. Therefore, the more weight the vehicle got rid of, the farther the vehicle went.
Now let me explain how the vehicle works. The first step was to pull back the rubber band from the two poles next to one another. Then you tie the string to the third pole which is ready to launch just as you see in the picture above. Now you ignite the string which causes the rubber band contracting which makes the weight fly in the opposite direction and that is when the vehicle begins to move.
Next year, we will learn about all three laws of motion and many other laws in our science classrooms. In this class project, we need a block of wood, 3 wooden poles, rubber band, cotton string, and finally our wooden block which is being flung. In this photo, the container will be flung and effect of that would be the vehicle moving.
